kicad project amp
![]()
a cool table showing the workflow of all the kicad projects.
| project_name | DRC | ERC |
|---|---|---|
| 10MHz-amp | ❌ | ❌ |
for a quick guide check project setup
This is a simple project template for new kicad projects. This template has some basic setup already completed such as workflows for auto creating all the things you forget when creating a kicad project such as:
This workflow will also run the design rules check on the PCB and schematic to ensure that you upload a working PCB. These reports are uploaded as summaries within the github actions tab. This template has a simple schematic PCB in it (because DRC fails on an empty PCB). Shown below is the example PCB.

besides from that the project also has:
- common predefined trace widths
- smallest vias size JLCPBC allows
- custom net colours in the schematic editor
redfor +Vbluefor -Vgreyfor ground
to create a repo from this template follow this guide
contained in this template are:
-
.github/: all files relating to github actions and other admin see here for more example of what can be placed in itreport_processing: where the python scripts are stored for processing the json report data from kicadreport_templates: where the template for said reports are storedworkflows/: this is where the github actions are keptmain.yaml: the main github action that will auto generate all files required and run DRC and ERC
rename.py: the script for renaming the project
-
hardware/: this is where the kicad projects live note this can be changed -
docs/: this is where the generate docs are placed by defaultBOM/: where the bill of materials and price breakdown are keptbill_of_materials.csv: the auto generated bom for the kicad projectbom_report.md: a report for the bill of materials
template_schematic.pdf: the schematic for the kicad project, auto generated by the github action
-
pcbs/: this is where the auto generated gerbers for the kicad project are stored -
res/: where resources are stored for the README -
.gitignore: a slightly modified gitignore from the standard one -
project_settings.yaml: where the settings for this project is stored -
README.md: this file, suggest you change this one creating your project
project settings
there are currently very few project settings that can be changed (will will be change in the future) these are:
| setting | description |
|---|---|
| has_been_set_up | a flag to tell the setup action if the project has been set up |
| project_name | the name of the project, this will be set to the name of the repo |
| production_formats | the output production format for the PCBs |
| dynamic_read_me | allow the readme to be updated using the given template |
| bom_template_path | the template used to write the bom report files |
| erc_report_template_path | the template used to write the erc report files |
| drc_report_template_path | the template used to write the drc report files |
| readme_template_path | the template used to write projects readme |
| schematic_output_name | the name suffix of the generated schematics |
| bom_csv_output_name | the name suffix of the generated bom csv file |
| bom_report_output_name | the name suffix of the generated bom report |
| production_file_output_name | the name suffix of the generated production file |
| schematic_output_path | the output path of the generated schematics files |
| bom_csv_output_path | the output path of the generated bom csv file |
| bom_report_output_path | the output path of the generated bom report |
| production_file_output_path | the output path of the generated production file |
project setup
creating a new repo with the template
creating a new template from a repo is simple:
-
click on the button in the top right hand corner called
use this template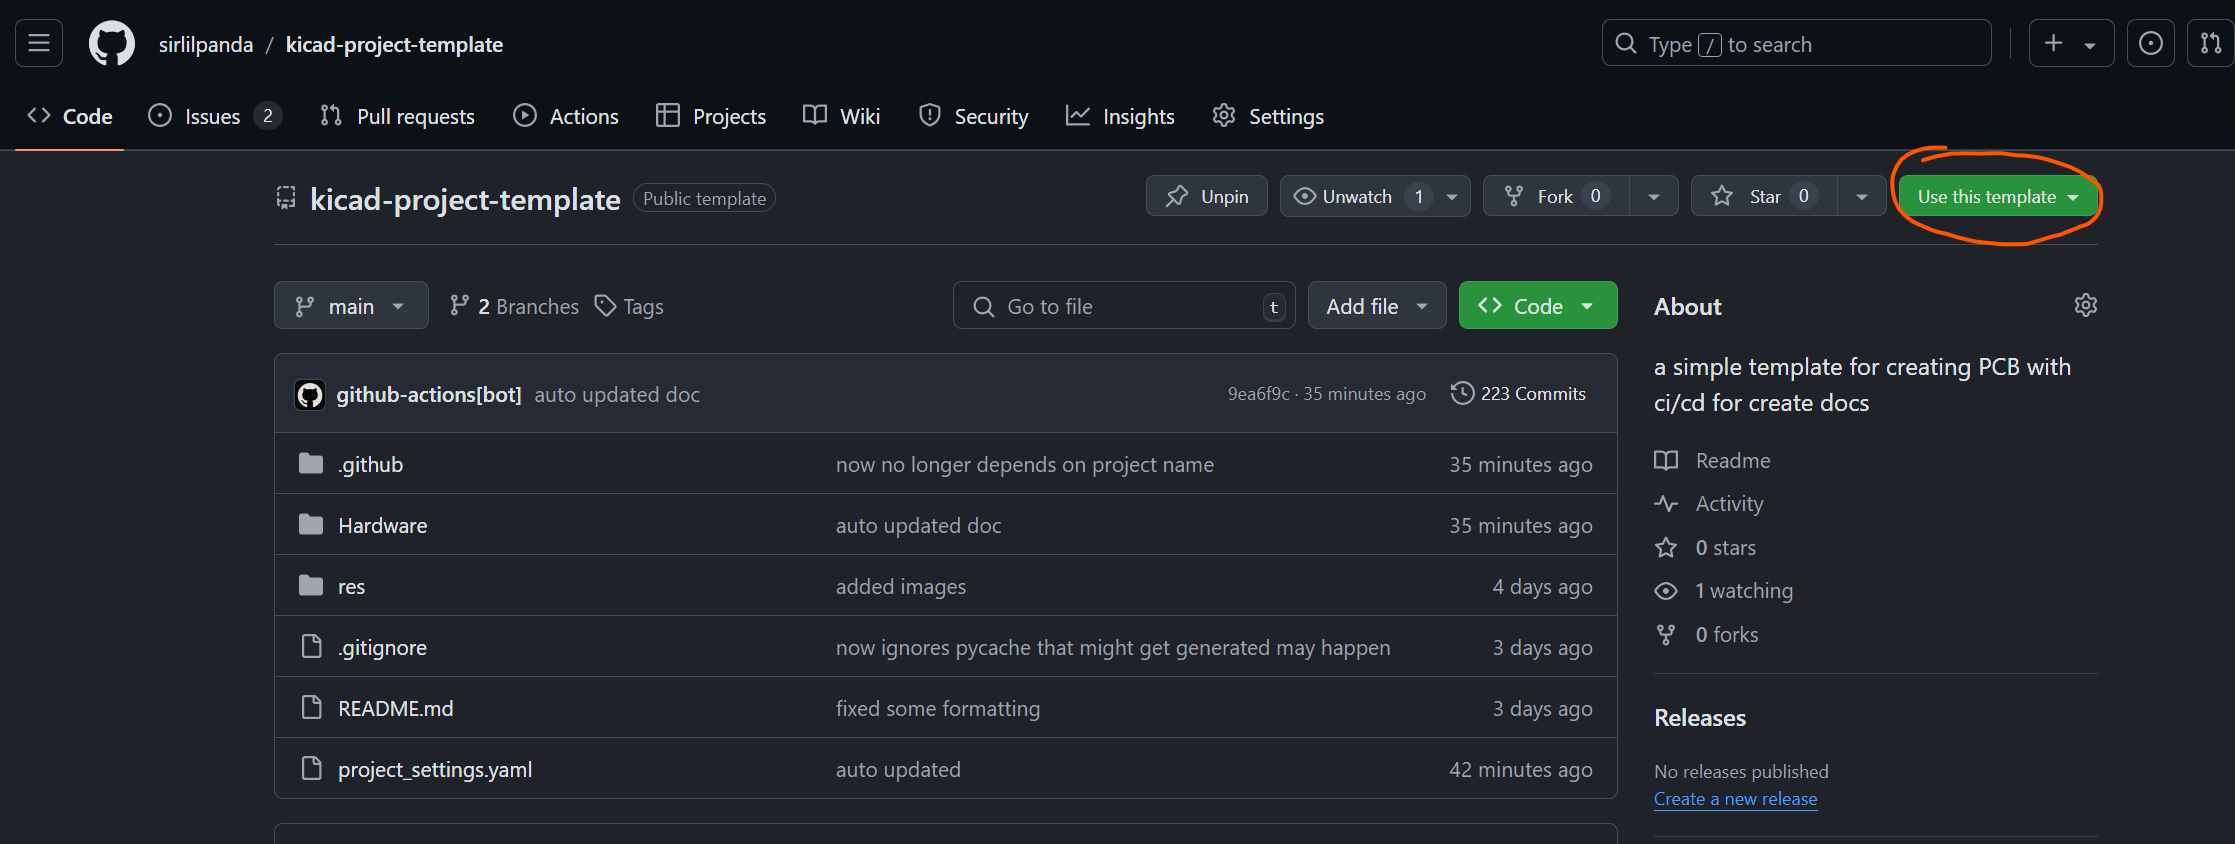
-
when the drop down menu appears click on
create a new repository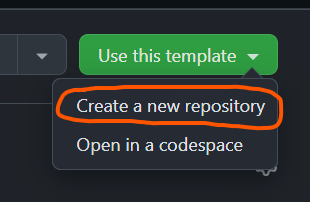
-
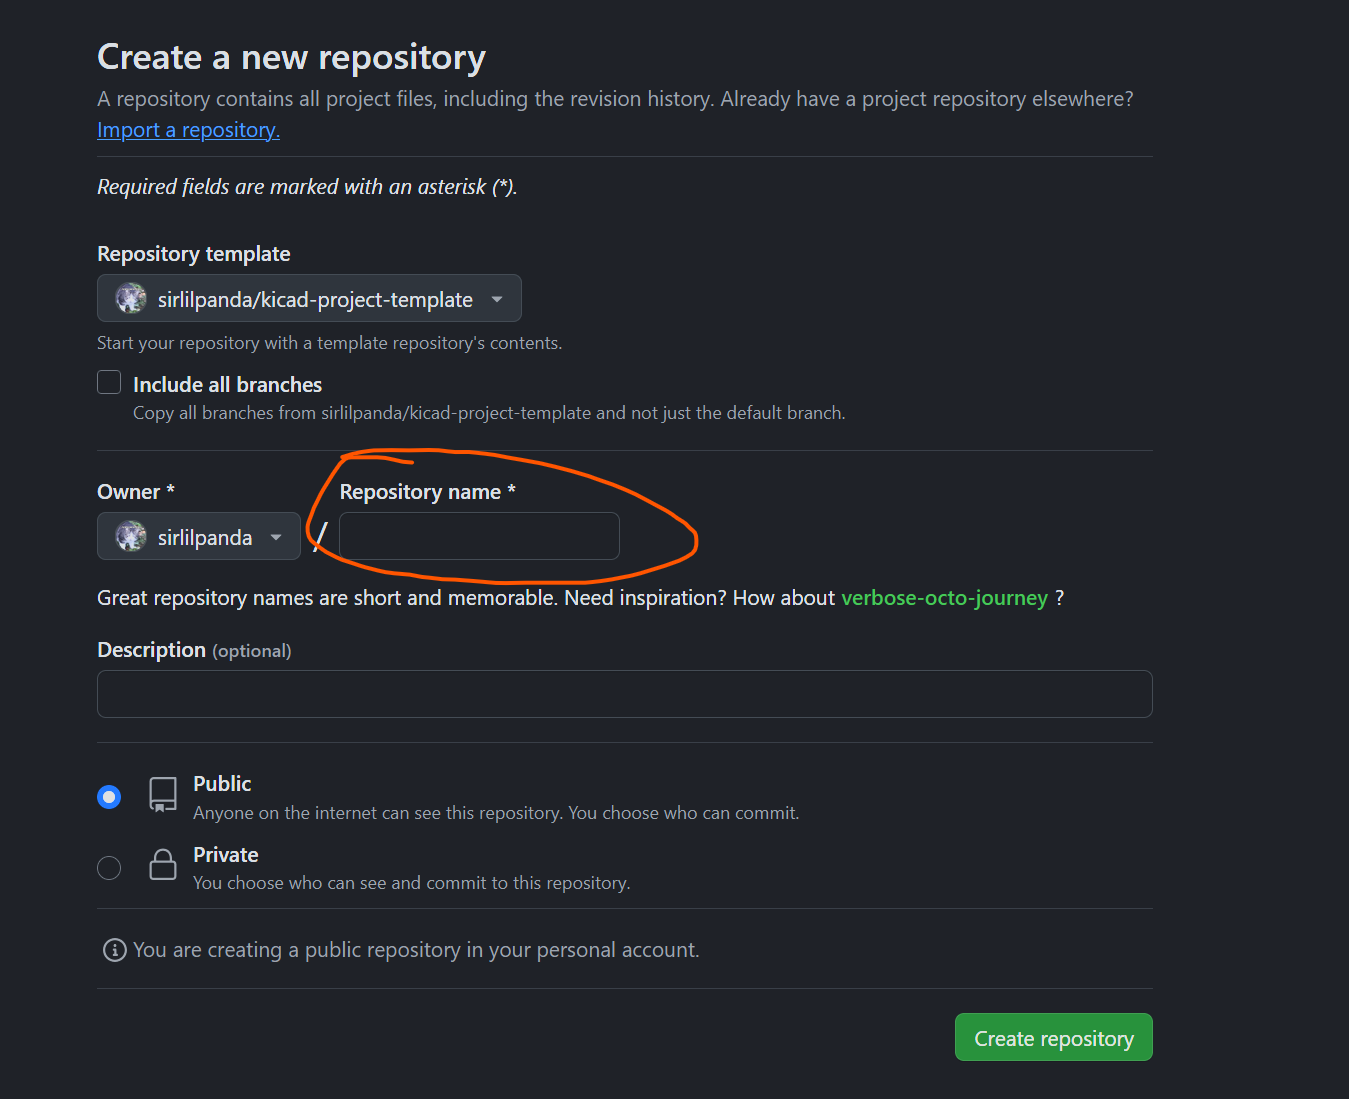
once you click you will be brought to this page, note that the repo name you choose here will be the name that you kicad project is called.


after these steps you then need to configure the repo settings to do their magic see configuring repo settings for what to do next.
configuring repo settings
once you have created a new repo with the template, you ill have to configure the github action settings. this is because you will get an error that looks something along these lines:
 where the action can not commit the changes due to not having permissions follow these steps:
- open the repo setting
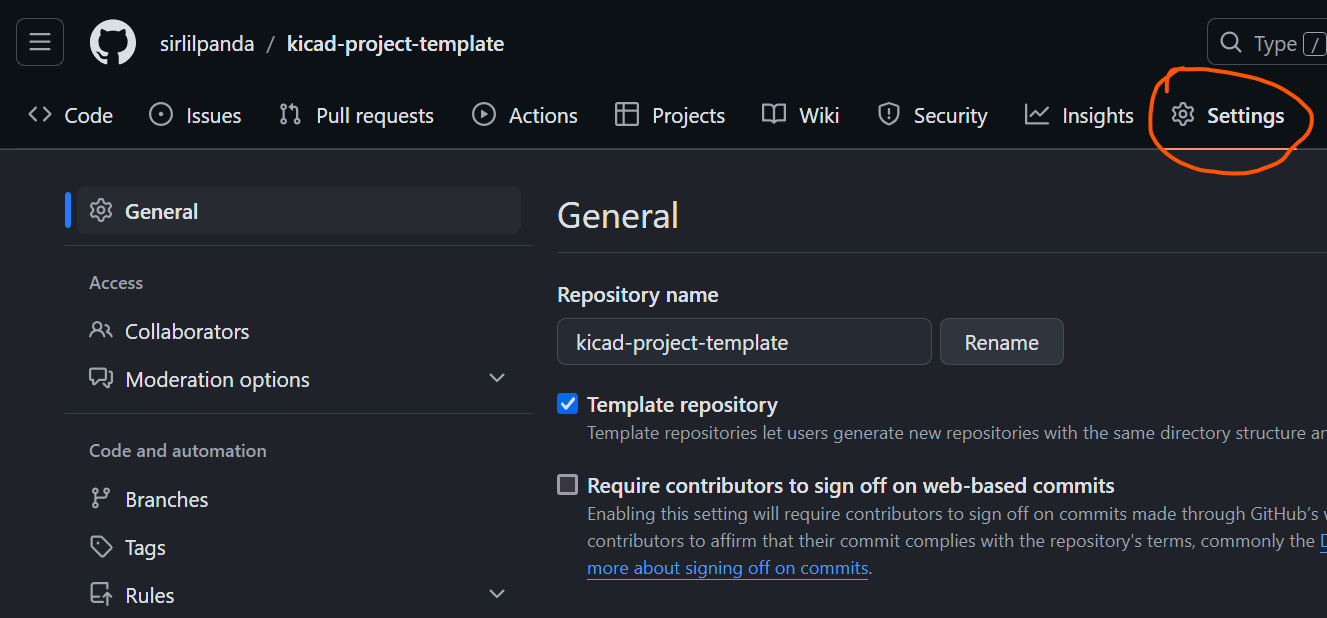
- then head in to actions : General
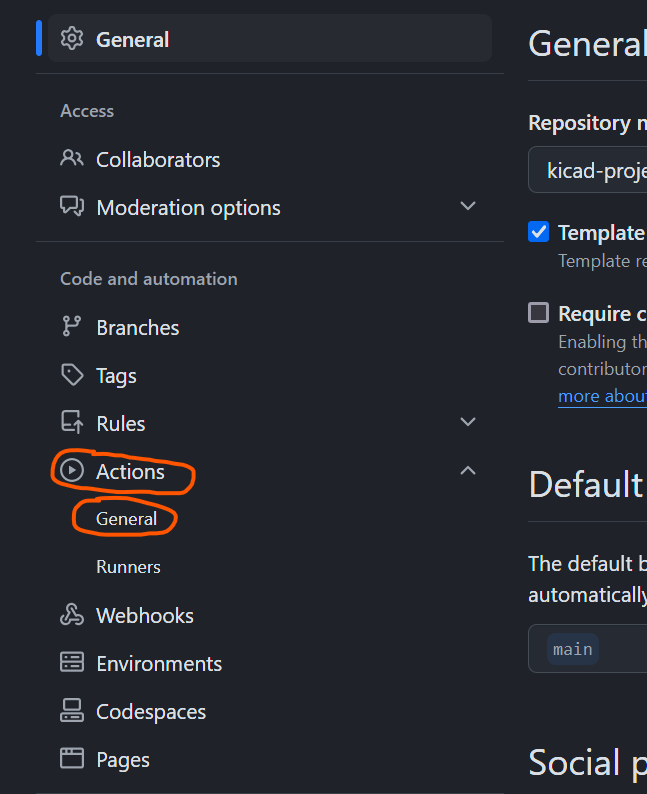
- then scroll down to workflow permissions and ensure that both
Read and write permissionsandAllow GitHub Actions to create and approve pull requestsare ticked as seen below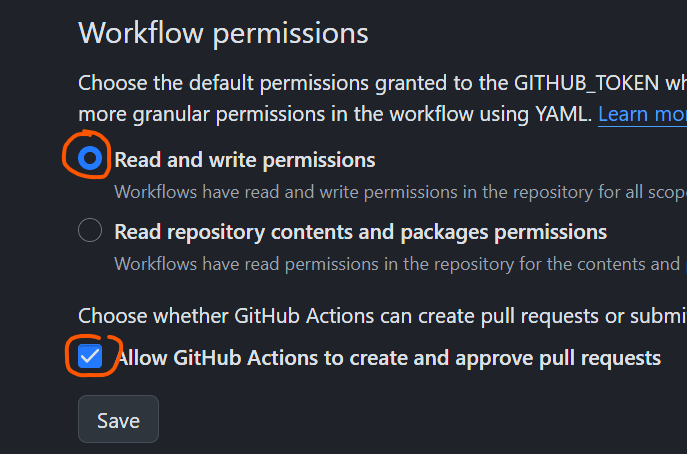


this should fix the problem if not, go harass stack overflow they need it
Once all of these steps have been followed the workflow should be passing, however the README.md will only update on the next push request.
editing the readme
As this repo can and will automatically update the repo corresponding to the given readme template. If you dont want to use this you can always disable this by setting the dynamic_read_me to false. but if you want some very cool features like auto updating tables to show what projects are passing the rules check or simple links to parts of your directory. then have a look at the template readme and learn mustache